There’s something undeniably comforting about a dish that wraps rich, savory fillings in tender pasta, smothered in luscious tomato sauce and bubbling cheese. Enter baked manicotti-a timeless Italian classic that transforms simple ingredients into an unforgettable meal. Whether you’re a seasoned home cook or a curious foodie eager to explore authentic flavors, mastering baked manicotti opens the door to a world of culinary delight. In this guide, we’ll unravel the secrets behind perfectly cooked pasta shells, luscious ricotta fillings, and that golden baked finish, helping you bring a slice of Italy right to your dinner table. Prepare to impress, indulge, and fall in love with every delicious bite.
Choosing the Perfect Pasta and Filling Combinations for Authentic Flavor
Mastering Baked Manicotti opens the door to a world where simple ingredients transform into a comforting Italian masterpiece. The foundation of this dish lies in selecting the right pasta tubes and combining them seamlessly with a luscious filling that brings authentic flavor to every bite. Traditionally, manicotti pasta is large, tubular, and smooth or ridged-each type lending a slightly different texture and sauce absorption. Opt for fresh manicotti sheets if you have the time to roll your own, or high-quality dried tubes that hold their shape well after baking.
When it comes to fillings, the classic ricotta mixture is a canvas waiting for the perfect balance of creamy richness and vibrant herbs. The secret is combining ricotta with shredded mozzarella and a touch of Parmesan for depth. Fresh basil, parsley, and a hint of garlic elevate the filling to truly authentic Italian bliss. resistance to over-seasoning is key-allow the freshness of the herbs to shine while the cheeses create a velvety texture that fills each tube to luscious perfection.
Crafting the Creamiest Ricotta Mixture with Fresh Herbs and Seasonings
Achieving the creamiest ricotta filling requires both the right ingredients and technique. Start with high-quality whole-milk ricotta, drained if necessary to prevent watery filling, combined with freshly shredded mozzarella for meltability. Incorporate finely chopped fresh herbs such as basil and flat-leaf parsley alongside minced garlic and a pinch of nutmeg for subtle warmth. Season thoughtfully with sea salt and cracked black pepper to enhance-but not overpower-the delicate cheese flavors.
For extra silkiness, mixing in a whole egg binds the filling while contributing to a tender, custardy texture onc baked. The balance of moisture ensures the stuffing remains creamy without becoming runny, maintaining stability inside the pasta shells. This luscious,herbaceous filling is the heart of baked manicotti’s irresistible appeal.
Secrets to Achieving a Golden Baked Cheese Topping Every Time
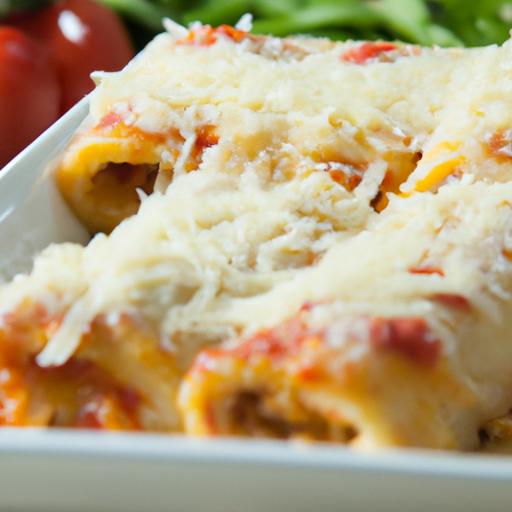
Nothing signals a perfectly baked manicotti like a shimmering, golden cheese crust crowning the dish. To achieve this coveted topping, layering is crucial. Begin by smothering the pasta tubes in a rich tomato sauce that is neither too watery nor too thick-this helps the cheese melt evenly without burning.
Top your filled manicotti with a generous handful of shredded mozzarella blended with finely grated Parmesan for a cheesy crust that crisps beautifully. For an even deeper golden color and slight crunch, broil the dish for the last 2-3 minutes of baking, watching carefully to prevent scorching. This final touch transforms baked manicotti into an enticing centerpiece teeming with bubbly, golden cheese that invites you to dive in.
Tips for Serving and Pairing Baked Manicotti with Conventional Italian Sides
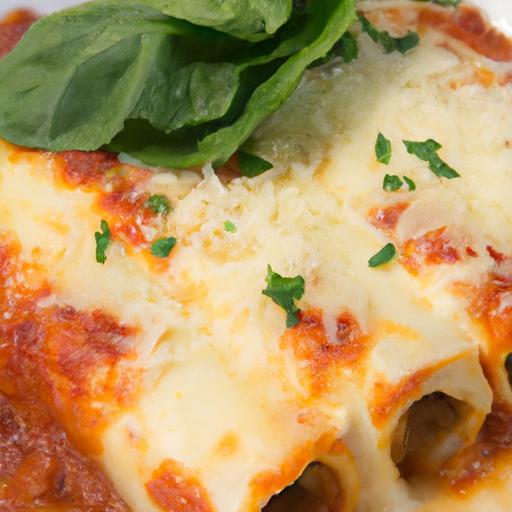
The full experience of baked manicotti blossoms when paired thoughtfully with classic Italian sides and garnishes that complement each bite. Serve the dish piping hot, garnished with torn fresh basil or a sprinkle of chopped flat-leaf parsley to add freshness and contrast to the rich cheeses.
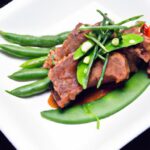
Traditional pairings include a crisp mixed green salad lightly dressed with lemon and olive oil or a simple array of roasted seasonal vegetables like zucchini, bell peppers, or eggplant. A warm, crusty Italian bread, such as focaccia or ciabatta, is perfect for sopping up any remaining sauce. To bring the meal to a satisfying close, a lightly dressed arugula salad with shaved Parmesan and toasted pine nuts adds peppery notes that balance the creaminess.
For beverage pairings, stick to refreshing options like sparkling water infused with lemon or herbal iced teas to maintain the meal’s bright and vibrant spirit. Bringing together these elements ensures that every baked manicotti dinner feels like a celebration of authentic Italian comfort food.
Prep and Cook Time
- Preparation: 25 minutes
- Cooking: 40 minutes
- Total: 1 hour 5 minutes
Yield
Serves 6 generous portions
Difficulty Level
Medium - approachable for confident home cooks seeking to master Italian classics
ingredients
- 12 manicotti pasta tubes (dried or fresh)
- 2 cups whole-milk ricotta cheese
- 1 ½ cups shredded mozzarella cheese, divided
- ½ cup freshly grated Parmesan cheese, divided
- 1 large egg, lightly beaten
- 2 cloves garlic, minced
- 2 tbsp fresh basil, finely chopped
- 2 tbsp fresh flat-leaf parsley, finely chopped
- 1 tsp sea salt
- ½ tsp freshly ground black pepper
- ¼ tsp ground nutmeg
- 4 cups rich tomato marinara sauce (homemade or high-quality store-bought)
- 2 tbsp extra virgin olive oil
instructions
- Preheat oven to 375°F (190°C). Lightly grease a 9×13 inch baking dish with olive oil.
- Cook manicotti tubes in a large pot of boiling salted water until just al dente, about 5-6 minutes for dried pasta (fresh manicotti sheets should be blanched briefly).Drain and set aside on a drizzle of olive oil to prevent sticking.
- Prepare the ricotta mixture: In a large bowl, combine ricotta, 1 cup mozzarella, ¼ cup Parmesan, beaten egg, minced garlic, basil, parsley, sea salt, black pepper, and nutmeg. Stir gently until creamy and well blended.
- Fill the manicotti: Using a small spoon or piping bag, carefully fill each manicotti tube with the cheese mixture, taking care to avoid tearing the pasta.
- Spread 1 ½ cups of marinara sauce evenly over the bottom of the baking dish. Arrange the filled manicotti tubes side by side in the sauce.
- Top the tubes with remaining marinara sauce. Sprinkle with the remaining mozzarella and Parmesan cheeses, ensuring even coverage.
- Bake uncovered for 35-40 minutes until the sauce bubbles and the cheese topping is melted and golden.
- Broil for 2-3 minutes if necessary to achieve a deep golden, slightly crisp cheese topping-watch closely to prevent burning.
- remove from oven, cool slightly, garnish with fresh basil or parsley, and serve warm.
Chef’s Notes
- For optimal ricotta texture, place ricotta in a fine mesh strainer over a bowl and allow excess whey to drain for 30 minutes before mixing.
- To make ahead: assemble the manicotti in the baking dish, cover tightly, and refrigerate for up to 24 hours before baking.
- Substitute part of the ricotta with cottage cheese for a lighter filling, though texture will vary slightly.
- Adding finely chopped sautéed spinach or mushrooms enriches the filling with vibrant earthy notes.
- If marinara sauce is too acidic,balance with a pinch of sugar or add sautéed onions to your base sauce.
Serving Suggestions
- Plate baked manicotti with a fresh arugula salad tossed in lemon vinaigrette to cut through richness.
- Add a side of grilled or roasted seasonal vegetables like zucchini, eggplant, or bell peppers for color and balance.
- Garnish with torn fresh basil leaves and a drizzle of high-quality extra virgin olive oil for an aromatic finish.
- Serve with warm crusty Italian bread, perfect for dipping into tangy, leftover sauce.
| Nutrient | Per Serving |
|---|---|
| Calories | 480 kcal |
| Protein | 28 g |
| Carbohydrates | 45 g |
| Fat | 18 g |

For further inspiration on italian pasta dishes,consider exploring our Ultimate Guide to Lasagna. to deepen your understanding of pasta types and pairings, visit Pasta.com.
Q&A
Q&A: Mastering Baked Manicotti - A Delicious Italian Classic Guide
Q1: What exactly is baked manicotti?
A: Baked manicotti is a beloved Italian-American dish featuring large tubular pasta shells stuffed generously with creamy ricotta cheese, spinach, herbs, and sometimes sautéed vegetables or ground meats like beef or turkey. The filled pasta is than covered in rich tomato sauce, sprinkled with cheese, and baked until bubbly and golden-a comforting, heartwarming meal perfect for any occasion.
Q2: how do I prevent the manicotti shells from breaking while filling them?
A: Handling those delicate tubes can be tricky! To prevent cracking, always boil the pasta just until al dente, not too soft. Drain and cool them slightly before filling to reduce fragility. Using a piping bag or a resealable plastic bag with a corner snipped off makes stuffing easier and gentler on the shells than spooning the filling in.
Q3: Can I make manicotti ahead of time?
A: absolutely! You can assemble the manicotti a day ahead and keep it covered in the refrigerator. When ready to bake, just add a little extra sauce on top to keep the pasta moist and bake until hot and bubbly. This makes manicotti an excellent dish for entertaining or busy weeknights.
Q4: What variations of filling can I experiment with?
A: Creativity is the secret ingredient! Traditional fillings frequently enough include ricotta mixed with spinach and herbs like basil or parsley. But you can also try sautéed mushrooms for an earthy depth, roasted butternut squash for a hint of sweetness, or replace some ricotta with creamy cheeses like mascarpone or mozzarella. For a protein boost, ground turkey, chicken, or lentils work wonderfully.
Q5: What kind of tomato sauce should I use?
A: A simple, well-seasoned marinara is the perfect partner to the rich filling. Whether homemade or store-bought, look for a sauce with fresh garlic, ripe tomatoes, and a touch of Italian herbs. If you love a bit of spice, a pinch of crushed red pepper flakes adds a subtle kick without overpowering the dish.
Q6: Any tips for achieving that perfect golden crust on top?
A: The key is the cheese topping! A generous sprinkle of shredded mozzarella mixed with a hard cheese like Parmesan creates a beautifully golden, bubbly finish. For extra browning, place the manicotti under the broiler for 1-2 minutes at the end-just watch closely so it doesn’t burn.
Q7: How do I know when my baked manicotti is perfectly done?
A: Look for these signs: the sauce should be bubbling around the edges, the cheese on top melted and lightly browned, and the pasta tender throughout. You can also insert a knife or fork into the middle; it should glide in easily without resistance, indicating the pasta and filling are cooked through.
Q8: Can manicotti be made gluten-free or dairy-free?
A: Yes! Many stores sell gluten-free manicotti shells, or you can use gluten-free pasta tubes or even homemade crepes as a wrap.For dairy-free versions, substitute ricotta with plant-based cheese alternatives like cashew ricotta, and use dairy-free mozzarella-style shreds. Just ensure your tomato sauce is free of hidden dairy ingredients.
Q9: What sides pair well with baked manicotti?
A: Sence manicotti is rich and hearty, lighter sides balance the meal beautifully. A crisp arugula salad with lemon vinaigrette, steamed green beans with garlic, or oven-roasted vegetables like zucchini and bell peppers make excellent companions. A simple Italian herb bread or garlic knots can also complement the indulgence.
Q10: How do I store and reheat leftover manicotti?
A: Leftovers store well in an airtight container in the refrigerator for 3-4 days. To reheat, cover with foil and warm in the oven at 350°F (175°C) until heated through to preserve the flavors and prevent drying out. Microwaving works too but may result in a softer texture. for longer storage, manicotti freezes well-just wrap tightly and reheat from frozen in the oven.
Mastering baked manicotti means embracing its comforting layers of flavor while having fun with your fillings and sauces. With these tips, your kitchen is ready to recreate this Italian classic with confidence and flair! Buon appetito!
Insights and Conclusions
As you close the oven door on your perfectly baked manicotti, you’re not just serving a meal-you’re sharing a piece of Italian tradition, crafted with your own hands.Mastering this classic dish is more than following a recipe; it’s about understanding the harmony of flavors, the art of layering cheese and sauce, and the joy of creating something comforting and timeless. So whether you’re a seasoned chef or a kitchen novice, let this guide be your invitation to explore, experiment, and most importantly, savor every cheesy, saucy bite. buon appetito-and may your baked manicotti always come out golden, bubbling, and unforgettable.