There’s somthing irresistibly magical about a spoonful of chili crisp-a bold, crispy, adn aromatic condiment that transforms any dish into a symphony of fiery flavors and textures. Originating from Sichuan cuisine, this spicy oil-infused masterpiece has captivated taste buds worldwide, inspiring home cooks to recreate its addictive crunch and heat in their own kitchens. If you’ve ever dreamed of crafting your own batch of homemade chili crisp, brimming with smoky chilies, toasted garlic, and sizzling spices, you’re in the right place. In this step-by-step recipe guide, we’ll unlock the secrets behind this legendary condiment, empowering you to infuse your meals with a homemade kick that’s vibrant, nuanced, and utterly unforgettable. Get ready to ignite your culinary creativity and dive into the world of fiery homemade chili crisp!
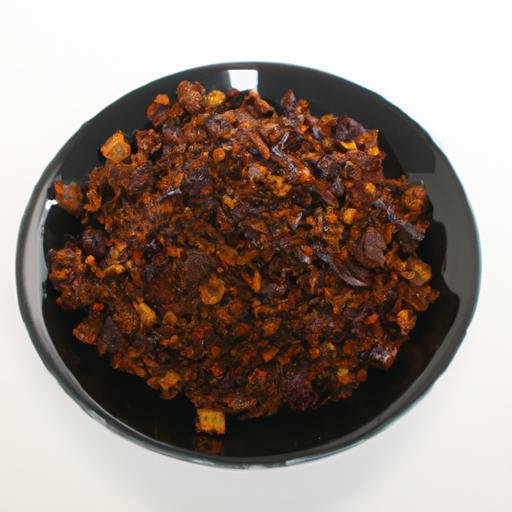
Fiery Homemade Chili Crisp is the ultimate condiment to ignite your dishes with vibrant heat and irresistible crunch. Originating from the Sichuan province of China, this fragrant chili oil infused with toasted aromatics and crispy bits has become a beloved staple worldwide. Creating your own from scratch unlocks the magic of customizing flavors-balancing smoky, spicy, and savory notes with just the right amount of crunch. Whether drizzled over noodles, steamed vegetables, or rice bowls, this fiery homemade chili crisp elevates every bite with its bold intensity and captivating aroma.
Prep and Cook Time
- readiness: 15 minutes
- Cooking: 20 minutes
- Total Time: 35 minutes
Yield
Approximately 1 ½ cups of chili crisp, perfect for multiple servings and gift-giving.
Difficulty Level
medium – requires attention to temperature and timing to achieve the ideal crispiness without burning.
Ingredients
- 1 cup neutral oil (such as grapeseed or vegetable oil)
- ½ cup dried red chili flakes (adjust heat to preference)
- ¼ cup crispy fried shallots
- 2 tablespoons toasted crushed Sichuan peppercorns
- 3 cloves garlic, finely minced
- 1 tablespoon finely grated ginger
- 2 tablespoons soy sauce
- 1 teaspoon sugar
- 1 teaspoon salt
- Optional: 1 tablespoon toasted sesame seeds or chopped roasted peanuts for added texture
Instructions
- prepare aromatics: In a small bowl, combine the minced garlic and grated ginger with soy sauce, sugar, and salt. Stir until the sugar dissolves. This creates a flavorful base to infuse into the oil.
- Toast peppercorns carefully: Heat a dry skillet over medium heat. Add the sichuan peppercorns and toast, stirring constantly until fragrant (about 2 minutes). Remove and crush lightly using a mortar and pestle or spice grinder.
- warm the oil: In a small saucepan, combine the neutral oil with the aromatic soy sauce mixture. Gently heat over medium-low, stirring frequently to infuse flavors without burning the garlic and ginger.
- Add chili flakes and peppercorn: Once the oil is warm (approximately 250°F/120°C, or when small bubbles form around a wooden chopstick dipped in oil), reduce heat to low and add the chili flakes and toasted Sichuan peppercorns. stir gently and cook for 5 minutes, making sure the chili does not burn, which would cause bitterness.
- Combine fried shallots and optional crunch: Remove the oil mixture from heat and carefully stir in the crispy fried shallots. If using, add toasted sesame seeds or chopped peanuts here for extra texture and nutty aroma.
- Cool and jar: Let the mixture cool fully to room temperature-this deepens the flavor and ensures the perfect crunch. Transfer to sterilized glass jars and store in the refrigerator.
- Infuse and enjoy: For peak flavor, allow your fiery homemade chili crisp to rest for at least 24 hours before use. The flavors meld beautifully, creating a vibrant, complex condiment.
Tips for Success
- Control the heat: adjust chili flakes quantity to suit your spice tolerance, but don’t skimp on quality-fresh, coarsely ground flakes produce the best flavor.
- Oil temperature matters: Use a thermometer or the chopstick bubble test to avoid overheating oil, which causes burnt spices and bitterness.
- Customize the crunch: Swap fried shallots for garlic chips for variation, or mix both for an amplified crispy texture.
- Make-ahead magic: This condiment improves over time and can be stored refrigerated for up to a month.
- Clean jar: Make sure your jar is sterilized and dry to maintain freshness and prevent spoilage.
Serving Suggestions
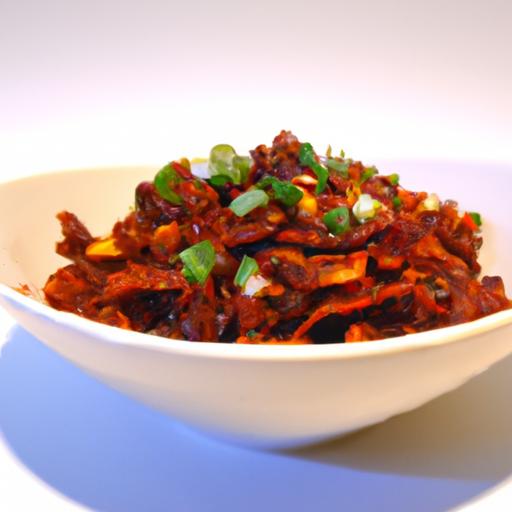
This fiery homemade chili crisp shines when drizzled atop steaming bowls of ramen, tossed with stir-fried greens, or spooned over simple congee for an explosion of flavor.Garnish with finely sliced scallions, fresh cilantro leaves, or toasted sesame seeds to elevate presentation and add a burst of color. Try swirling a spoonful into your next batch of fried rice or seafood dishes to instantly infuse heat and aroma.

| Nutrient | Per 1 Tbsp |
|---|---|
| Calories | 90 |
| Protein | 0.2 g |
| carbohydrates | 1.5 g |
| Fat | 9.3 g |
For those intrigued by more homemade Asian condiments, check out our Asian-Inspired hot Sauces Recipe Collection. To deepen your understanding of chili peppers and their heat levels, visit the PepperScale website for expert insights.
Q&A
Q&A: Fiery Homemade Chili Crisp – A Step-by-Step recipe Guide
Q1: What exactly is chili crisp, and why is it so beloved?
A1: Chili crisp is a crunchy, spicy condiment that bursts with bold flavors-think fiery chili flakes, toasted garlic, crunchy bits, and fragrant spices swimming in sizzling oil. It’s beloved worldwide for its addictive texture and ability to transform anything from noodles to roasted veggies into a flavor fiesta.
Q2: Why make chili crisp at home instead of buying it?
A2: Homemade chili crisp lets you tailor the heat, texture, and flavor to your exact craving. Plus, you control the ingredients-no preservatives, no artificial bits-just pure, crispy goodness. It’s also a fun kitchen adventure with an incredibly rewarding payoff!
Q3: What are the key ingredients for homemade chili crisp?
A3: The magic starts with good-quality dried chili flakes, garlic, shallots or onions, a pinch of sugar to balance heat, toasted sesame seeds or nuts for crunch, and neutral oil (like vegetable or canola) to infuse it all with rich flavor. Optional extras: star anise, Sichuan peppercorns, or a splash of soy sauce for complexity.
Q4: How do you achieve that perfect crispy texture?
A4: Patience is key! Slowly fry minced garlic and shallots in oil over medium-low heat until golden brown and irresistibly crispy. Let each ingredient toast gently to unlock their nutty flavors without burning. drain any excess oil to keep those crunchy bits crisp and ready to crackle on your tongue.
Q5: Can I customize the spice level?
A5: Absolutely! Adjust chili flakes to your preferred heat-use mild Aleppo or cayenne for gentle warmth, or crank it up with crushed bird’s eye chilies or dried arbol peppers. Remember, the oil itself can mellow the heat, so tasting as you go ensures a perfect balance.
Q6: How should I store homemade chili crisp?
A6: Store chili crisp in a clean, airtight jar at room temperature for up to a month.for longer shelf life, refrigeration is recommended-it might firm up a bit but will maintain that fiery punch. Always use a dry spoon to avoid moisture contamination.
Q7: What dishes shine brightest with a dollop of chili crisp?
A7: The possibilities are endless! Drizzle it on steamed dumplings, swirl into fried rice, brighten up scrambled eggs, or even spoon it over creamy avocado toast. It’s equally dazzling mixed into dressings or as a fried chicken dipping sauce. One bite, and suddenly ordinary meals become unforgettable.
Q8: Any troubleshooting tips for first-timers?
A8: Keep the oil temperature steady and don’t rush the frying process-burnt garlic equals bitter chili crisp. If your mixture seems too oily, drain a bit of the excess oil to preserve the crunch. And if it’s too spicy, try adding a touch more sugar or toasted sesame to soften the fire without dulling the flavor.
Get ready to ignite your taste buds and elevate your kitchen creations with this fiery homemade chili crisp recipe-as sometimes, a little heat and crunch make all the difference!
In Summary
As your homemade chili crisp cools and settles, you’ve not only crafted a deeply flavorful condiment but also unlocked a world of fiery possibilities.This step-by-step journey transforms simple ingredients into a crispy, spicy treasure that elevates everything from noodles to roasted veggies. Whether you drizzle it, dollop it, or stir it in, your kitchen-made chili crisp promises a perfect balance of heat, crunch, and umami-all tailored by your own hands. So go ahead, savor the satisfaction of creating this bold, addictive sauce, and let every meal benefit from the crispy, fiery magic you’ve just brought to life.