In a world where allergy awareness is more significant than ever,finding safe,tasty snacks for picky eaters can feel like a daunting quest. Enter the magic of DIY Uncrustables with seed butter-a clever twist on a classic treat that’s not only nut-free but packed with wholesome goodness.Imagine the convenience of those beloved, perfectly round sandwiches, now customizable and allergy-friendly, crafted right in your own kitchen.Whether you’re navigating school lunch restrictions or simply aiming to add variety to your snack game, this guide will unlock the secrets to creating your very own nut-free snack sensation that kids and adults alike will adore.Get ready to roll up your sleeves and dive into a world of creamy, dreamy seed butter delights!
DIY Uncrustables with Seed Butter offer a delightful twist on a classic childhood favorite, perfectly tailored for those seeking nut-free, allergy-conscious snacks that don’t compromise on flavor or texture.This creative choice embraces the rich, creamy essence of seed butters-like sunflower or pumpkin seed butter-transforming simple sandwiches into portable, wholesome bites ideal for lunchboxes, picnics, or on-the-go munching.
prep and Cook Time
- Preparation: 15 minutes
- Assembly: 10 minutes
- Total Time: 25 minutes
Yield
Makes approximately 8 nut-free uncrustables
Difficulty Level
Easy: Perfect for beginners and seasoned home cooks alike
Ingredients
- 8 slices soft white or whole wheat sandwich bread, crusts trimmed
- 1/2 cup smooth sunflower seed butter (or your preferred seed butter)
- 1/3 cup seedless fruit spread (such as strawberry, raspberry, or apricot)
- Optional: 1 tbsp honey or maple syrup for added sweetness
- Optional: A pinch of cinnamon or vanilla extract mixed into the seed butter for deeper flavor
Instructions
- Prepare your workspace: Lay out all ingredients and tools-soft sandwich bread, seed butter, fruit spread, and a round biscuit or sandwich cutter.
- Trim crusts: Using a serrated knife, gently remove the crusts from all bread slices to ensure smooth edges and the classic Uncrustables shape.
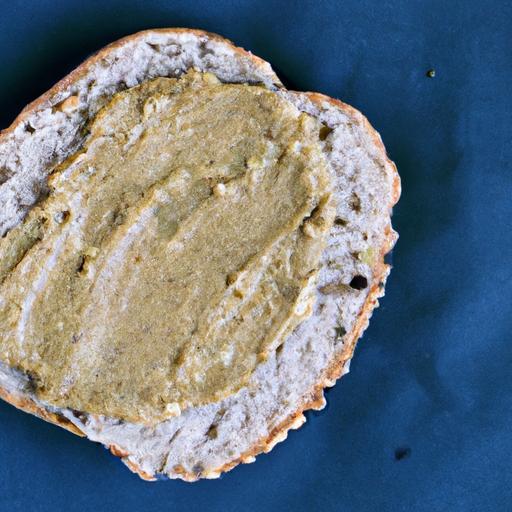
- Spread seed butter: Evenly spread about 1 tablespoon of seed butter onto four slices of bread. Be careful not to go too heavy to avoid squeezing out during sealing.
- Add fruit spread: On top of the seed butter, add 2 teaspoons of your chosen fruit spread. This layering keeps the sandwich moist but prevents sogginess.
- Seal sandwiches: Top each prepared slice with another slice of bread. Press gently to adhere just enough for the seal.
- Cut and seal: Center your biscuit cutter (about 3-inch diameter) on each sandwich. Press down firmly to create a neat, sealed edge while removing excess bread. If desired, pinch the edges with a fork for an extra seal.
- Chill: Place the uncrustables on a parchment-lined tray and refrigerate for at least 30 minutes. This solidifies the seed butter and helps maintain shape when handled.
- Serve or store: Enjoy promptly, or wrap tightly in plastic wrap or reusable silicone bags for later snacking.
Chef’s Notes
- Seed butter variety: try pumpkin seed butter or hemp seed butter for a nutritional boost and unique flavors.
- Make ahead: These uncrustables freeze beautifully. Freeze individually on a sheet before bagging to prevent sticking, then thaw at room temperature before serving.
- Texture tip: Slightly warm the seed butter for 10 seconds to soften it, making spreading easier and smoother without tearing the bread.
- Gluten-free option: Use gluten-free sandwich bread to accommodate dietary restrictions while preserving the classic shape.
- Sweetness balance: Adjust sweetness by mixing honey or maple syrup into seed butter or selecting fruit preserves without added sugar.
Serving Suggestions
Present these charming,round sandwiches on a colorful plate lined with fresh fruit slices like apple wedges,grapes,or berries. Garnish with a sprinkle of chia seeds atop a small dollop of seed butter on the side for extra crunch and nutritional punch.Pair with a chilled glass of almond milk or a refreshing cucumber-infused water for a balanced snack experience that’s pleasing to both the eye and palate.
| Nutrient | Per Uncrustable (approx.) |
|---|---|
| Calories | 150 |
| Protein | 4g |
| Carbohydrates | 20g |
| Fat | 7g |
Discover more allergy-friendly snack recipes in our Nut-Free snacks Collection for nourishing ideas all season long. For further insights on seed butters’ nutritional profile, visit Healthline’s detailed guide.

Q&A
Q&A: DIY Uncrustables with Seed Butter – Nut-Free Snack Magic
Q1: what exactly are DIY Uncrustables, and why make them at home?
A: DIY Uncrustables are homemade versions of those beloved crustless, sealed sandwiches – typically filled with jam or spread – inspired by the classic store-bought snack. Making them at home lets you customize fillings, control ingredients, and avoid allergens like nuts by using seed butters instead. Plus, they’re fresher and frequently enough more budget-friendly!
Q2: Why choose seed butter for DIY Uncrustables?
A: Seed butters – think sunflower, pumpkin, or tahini – are fantastic nut-free alternatives with a rich, creamy texture and unique flavors that complement sweet or savory fillings. They offer a safe choice for allergy-sensitive households while adding nutritional benefits like healthy fats, vitamins, and protein.
Q3: What are some popular seed butter options for these snacks?
A: Sunflower seed butter is a favorite for its mild, slightly sweet taste and smooth texture.Pumpkin seed butter brings a deep, earthy flavor with a hint of nuttiness minus the nuts. Tahini, made from sesame seeds, lends a rich, slightly bitter note that pairs especially well with sweet jams or honey (if desired).
Q4: Can I add othre fillings besides seed butter and jam?
A: Absolutely! While the classic combo is seed butter plus fruit jam, you can get creative. Try cream cheese with cucumber slices for savory, or apple butter with cinnamon for a sweet twist. Just be sure the fillings aren’t too wet or runny to keep your sandwiches sealed and mess-free.
Q5: How do I seal my DIY Uncrustables perfectly?
A: Use a small round sandwich cutter or a cookie cutter to cut your sandwiches, then press firmly along the edges to seal the crusts inside. You can use the tines of a fork to crimp the edges for extra security and a charming touch. Sealing properly keeps those yummy fillings inside and the crust safely tucked away.
Q6: Are these homemade Uncrustables freezer-friendly?
A: Yes! One of the best perks of DIY Uncrustables is their freezer-friendliness.Lay them flat on a baking sheet to freeze individually before stacking in a sealed container or bag. When you’re ready to enjoy, simply thaw at room temperature or microwave for a few seconds – snack time magic, ready when you are.
Q7: Can kids get involved in making these?
A: Definitely! DIY Uncrustables are hands-on,fun projects perfect for little chefs. Kids can spread the seed butter, add fillings, press cutters, and seal edges.It’s a great way to teach them about food prep, encourage creativity, and make snack time even more special.
Q8: Are there any tips to keep these snacks from getting soggy?
A: To prevent sogginess, avoid overloading with wet ingredients. Pat fruit fillings dry if too juicy and consider layering a thin spread of seed butter on each slice of bread before adding jam – this acts as a moisture barrier. Also, seal tightly and store properly in an airtight container or freezer bag.
Q9: what bread types work best for DIY Uncrustables?
A: Soft, fresh sandwich bread is ideal – white, whole wheat, or even gluten-free varieties work well.Choose bread with a sturdy texture that isn’t too airy, so it holds up when sealed and doesn’t crumble easily.For a healthier twist, look for whole-grain options packed with fiber and nutrients.
Q10: How do DIY Uncrustables fit into a busy lifestyle?
A: They make snacking effortless and mess-free, perfect for lunchboxes, picnics, or on-the-go fuel. Prep a batch on the weekend, freeze, and pull out as needed. With seed butters for allergy-safe nutrition and endless flavor combos, these little pockets of convenience are snack magic for busy days!
The Conclusion
Whipping up your own DIY Uncrustables with seed butter proves that nut-free snacks don’t have to be boring or complex. With just a handful of simple ingredients and a little creativity,you can craft delicious,allergen-friendly treats that are perfect for lunchboxes,picnics,or anytime hunger strikes. Whether you choose sunflower seed butter, pumpkin seed butter, or another favorite, these homemade pockets of goodness offer a safe and satisfying alternative to conventional nutty snacks. So next time you crave that classic, no-crust delight, remember: a little seed butter magic is all it takes to make snack time both safe and sensational.