Imagine biting into the perfect snack: soft, handheld pockets of sweetness that are as satisfying as they are simple-without a trace of nuts. Welcome to the world of DIY Seed Butter Uncrustables, where creativity meets convenience in a nut-free delight. Whether you’re catering to allergy-sensitive friends, exploring new flavors, or simply love all things homemade, these tasty treats transform humble seed butters into irresistible, snackable pockets of joy. In this article, we’ll guide you through easy step-by-step instructions, insider tips, and appetizing variations to help you craft your very own seed butter Uncrustables at home-because great snacks don’t have to be complicated or risky, just irresistibly good.
DIY Seed Butter Uncrustables are the perfect nut-free option for families seeking delicious,allergy-friendly snacks that don’t compromise on flavor or texture. The magic lies in choosing the ideal seed butter that blends creamy richness with easy spreadability, crafting soft, sealed sandwiches that delight both kids and adults alike.
Prep and Cook Time
- Readiness: 20 minutes
- Assembly: 15 minutes
- Total Time: 35 minutes
Yield
Makes approximately 8 uncrustables (servings)
Difficulty Level
Easy – perfect for beginners and fun to make with kids!
Ingredients
- 2 cups seed butter (sunflower, pumpkin seed, or tahini – smooth, unsweetened)
- 1 cup fruit spread or jam (preferably low sugar)
- 8 slices white or whole wheat sandwich bread, crusts removed
- Optional: 1 tsp chia seeds or ground flaxseed for added texture
- Cooking spray or a little oil for greasing your workspace
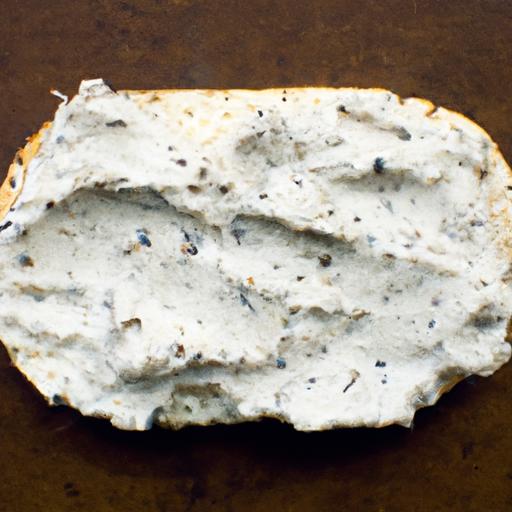
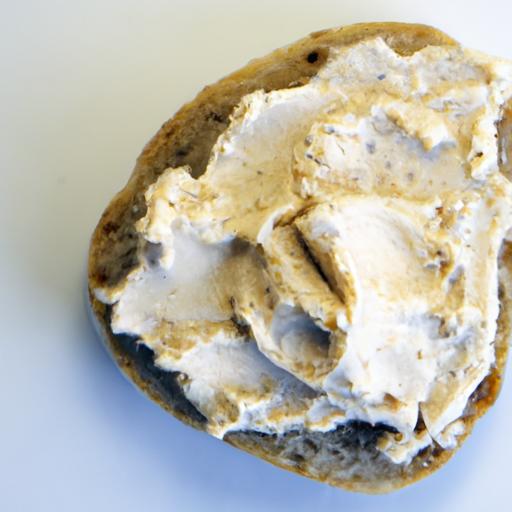
step by Step Guide to Crafting Soft and sealed Seed Butter Sandwiches
- prepare your workspace: Lightly grease your countertop or use a large silicone mat to prevent sticking when pressing the sandwiches.
- Trim crusts: remove the crusts from each bread slice carefully to ensure a perfect seal when pressing.
- Spread seed butter: evenly spread about 2 tablespoons of your chosen seed butter onto half of the bread slices, covering the surface edge to edge for maximum flavor.
- Add jam or fruit spread: On the other half of the slices, spread 1 tablespoon of your preferred jam, keeping the edges clear.
- Optional texture boost: Sprinkle a few chia seeds or ground flax on top of the seed butter before adding jam to add crunch and nutrition.
- Seal the sandwich: Press a jam-covered slice gently but firmly onto a seed butter-covered slice, aligning edges for a perfect match.
- Cut and seal: Using a crust cutter or a circular cookie cutter (~3.5 inches in diameter), firmly press down on the sandwich to seal the edges fully. Press twice if needed to prevent leakage.
- Repeat: Complete with the remaining slices until all sandwiches are sealed.
Creative Flavor Combinations to Elevate Your Nut-Free Snacks
- Sunflower seed Butter + Raspberry Jam + Fresh Mint: A refreshing twist with a pop of herbal brightness.
- Pumpkin Seed Butter + Apple Cinnamon Spread + Crushed Pecans (optional): A cozy, fall-inspired sensation that’s nut-free but rich in flavor.
- Tahini + Date Syrup + Toasted Sesame Seeds: Middle eastern flair with a touch of sweetness and crunch.
- Sunflower Butter + Blueberry Jam + Lemon Zest: Bright and vibrant, perfect for a mid-day snack boost.
Storage Tips to Keep Your DIY Uncrustables Fresh and Delicious
To maintain peak freshness and ideal softness, wrap each DIY seed butter sandwich tightly in parchment paper or plastic wrap.Store in an airtight container in the refrigerator for up to 5 days.For longer storage, freeze wrapped sandwiches inside a zip-top bag – thaw at room temperature for 30 minutes before serving for the best texture.
For picnics or packed lunches, keep your uncrustables chilled in an insulated lunch bag with a small ice pack to retain their soft, sealed texture and botanical freshness.
Chef’s Notes and Tips for Success
- Choosing your seed butter: Opt for smooth and creamy textures rather than chunky varieties for easier spreading and perfect sealing.
- Seed butter temperature: Bring your seed butter to room temperature before use; cold butter can tear bread or resist spreading.
- jam consistency: Thicker jams like blackberry or fig reduce leakage risk and help hold your sandwich together.
- Seal like a pro: Use a gentle but firm pressure to squash edges together twice – this prevents filling from oozing during storage.
- Make ahead: DIY seed butter uncrustables freeze beautifully – ideal for prepping a week of snacks ahead of time.
Serving Suggestions
Serve your uncrustables chilled or at room temperature on a colorful platter dusted with edible flowers or fresh fruit slices like strawberries, kiwi, or orange wedges for vibrant appeal. pair with crisp vegetable sticks or a small bowl of dairy-free yogurt for a balanced nut-free snack box.

| Nutrient | Per Sandwich |
|---|---|
| Calories | 210 kcal |
| Protein | 6 g |
| Carbohydrates | 22 g |
| Fat | 11 g |
Discover more allergy-friendly snack ideas in our Nut-Free Snacks Guide and explore the benefits of seed butters on Allergy & anaphylaxis Australia.
Q&A
Q&A: DIY Seed Butter Uncrustables – Tasty, Nut-Free snacks Made Easy
Q1: What exactly are Seed Butter Uncrustables?
A1: Seed Butter Uncrustables are homemade, nut-free sandwich snacks filled with delicious seed butter and your choice of jam or spread, sealed perfectly without crusts. They’re a creative twist on the classic uncrustable, designed to be allergy-friendly and fun to eat!
Q2: Why choose seed butter over traditional nut butters?
A2: Seed butters – like sunflower, pumpkin, or watermelon seed butter – are fantastic alternatives for those with nut allergies or sensitivities. they offer creamy texture,rich flavor,and plenty of nutrients,making them safe and wholesome for many kids and adults alike.
Q3: How do you make these Uncrustables at home?
A3: It’s surprisingly simple! Spread your favorite seed butter and jam between two slices of soft bread, gently press with a round cookie cutter or sandwich press, and squeeze out the air as you seal the edges. Voila! A perfect, portable snack ready for lunchboxes or on-the-go munching.
Q4: Can I use any type of bread for DIY Seed Butter Uncrustables?
A4: Absolutely! Soft sandwich breads work best-white, whole wheat, gluten-free, or even brioche. Just make sure the bread is fresh and pliable so it seals nicely without cracking or tearing.
Q5: What are some kid-friendly seed butter options?
A5: Sunflower seed butter tends to be the most popular kid-approved choice due to its mild, slightly sweet flavor. Pumpkin seed butter is a bit earthier but just as delicious, and watermelon seed butter offers a unique, nutty twist that adventurous snackers might enjoy.
Q6: How can I store DIY Seed Butter Uncrustables?
A6: Wrap each sandwich tightly in plastic wrap or store in airtight containers. They can be refrigerated for up to 3 days or frozen individually for up to 3 months. When ready to eat, thaw on the counter or enjoy chilled!
Q7: Are Seed Butter Uncrustables good for school lunches?
A7: Definitely! They’re mess-free, portable, and provide a protein-packed, allergy-friendly alternative to traditional nut butter snacks. Plus, kids love the familiar “uncrustable” shape and soft texture.
Q8: Can I customize these snacks beyond seed butter and jam?
A8: Yes! Feel free to experiment with additions like thin banana slices, a sprinkle of cinnamon, or a drizzle of honey (if age-appropriate). Just keep in mind that extra fillings may affect how well the sandwich seals.
Q9: What makes these DIY seed butter sandwiches more economical than store-bought options?
A9: Making your own uncrustables allows you to control quality ingredients, avoid preservatives, and save money by using everyday kitchen staples in larger quantities. plus, you get to tailor flavors and textures exactly to your liking!
Q10: Any tips to make perfect, easy-to-seal sandwiches?
A10: Use fresh, soft bread, spread fillings evenly but not to thick, and press firmly when sealing. A sandwich press or a round cookie cutter with a gentle squeeze works wonders. Also, removing the crusts before assembling creates that classic uncrustable feel.
Ready to roll up your sleeves and create your own allergy-friendly, scrumptious DIY Seed Butter Uncrustables? your snack game just got a whole lot tastier and safer!
In Retrospect
Crafting your own DIY Seed Butter Uncrustables isn’t just a fun kitchen adventure-it’s a wholesome way to enjoy tasty, nut-free snacks that everyone can feel good about. With a handful of simple ingredients and a dash of creativity, you can customize these pockets of goodness to suit your family’s tastes and dietary needs. Whether packed for lunchboxes, road trips, or afternoon pick-me-ups, these seed butter treats prove that delicious and allergen-friendly can go hand in hand. So roll up your sleeves, embrace the joy of homemade, and savor every bite of your handcrafted, nut-free snack sensation!