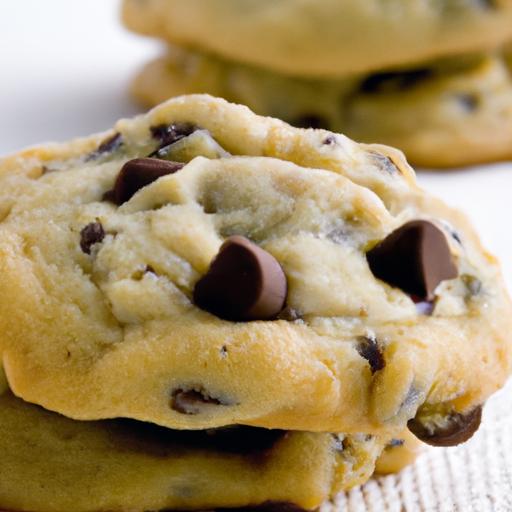
There’s something truly magical about biting into a warm, gooey chocolate chip cookie-teh way the chocolate melts just right, the crisp edges giving way to a tender center, and the nostalgic aroma that fills the kitchen. But achieving that perfect bite isn’t always as simple as following a recipe. Behind every flawless cookie lies a blend of science, technique, and a dash of culinary intuition. Welcome to The Ultimate Guide to Baking Perfect Chocolate Chip Cookies, where we’ll unravel the secrets to mastering this beloved classic. Whether you’re a novice baker or a seasoned cookie connoisseur, this guide will take you step-by-step thru the art and alchemy of transforming humble ingredients into that quintessential treat everyone craves. Let’s embark on a flavorful journey to cookie perfection-one chip at a time.
Mastering the art of baking perfect chocolate chip cookies begins with understanding every element that shapes their unforgettable texture and flavor. Selecting the ideal ingredients sets the foundation for cookies that emerge from your oven crisp at the edges yet delectably chewy in the center,bursting with bursts of rich,melty chocolate. Whether you’re a longtime cookie lover or a passionate baker keen to refine your skills, thes insights will elevate your baking game with every batch.
Prep and Cook Time
- Preparation: 15 minutes
- Chilling (optional for best results): 30 minutes to 1 hour
- Baking: 10-12 minutes
Yield
Approximately 24 medium-sized cookies
Difficulty Level
Easy to Medium – Perfect for bakers at any skill level
Ingredients
- 2 ¼ cups all-purpose flour, sifted
- 1 tsp baking soda
- ½ tsp fine sea salt
- ¾ cup unsalted butter, softened
- ¾ cup packed light brown sugar
- ½ cup granulated sugar
- 1 large egg, at room temperature
- 1 large egg yolk, at room temperature
- 2 tsp pure vanilla extract
- 2 cups high-quality semisweet chocolate chips
Instructions
- Preheat your oven to 350°F (175°C) and line two baking sheets with parchment paper.This ensures even baking and easy cleanup.
- Combine dry ingredients: Whisk together the sifted flour,baking soda,and salt in a large bowl.This step distributes leavening agents evenly,contributing to a tender crumb.
- Cream the butter and sugars: Using an electric mixer on medium speed, beat the softened butter with both sugars until it’s light and fluffy-about 3 to 4 minutes. This aeration is critical for the perfect texture.
- Add eggs and vanilla: Stir in the whole egg, egg yolk, and vanilla extract one at a time, blending thoroughly after each addition to create a smooth, cohesive batter.
- Incorporate dry ingredients: Gradually add the flour mixture into the wet ingredients, mixing at low speed until just combined. Avoid over-mixing; the dough shoudl be soft but not sticky.
- Fold in chocolate chips: Gently fold in the chocolate chips to distribute pockets of melted bliss throughout each cookie.
- Chill the dough (recommended): Cover and refrigerate for 30 minutes to 1 hour. This step firms the dough and encourages deeper flavor development.
- Shape the cookies: scoop heaping tablespoons of dough onto the prepared sheets, spacing at least 2 inches apart to allow for spreading.
- Bake until golden brown: Place in oven and bake for 10-12 minutes, or until edges are golden but centers remain soft. Rotate baking sheets halfway through for even cooking.
- Cool wholly: Let the cookies rest on baking sheets for 5 minutes before transferring to a wire rack to finish cooling.This prevents breakage and ensures they set perfectly.
Chef’s Notes and Tips for Success
- Ingredient choices: Use the highest quality butter and chocolate chips you can find-the richness of these ingredients directly translates into flavor.
- Dough consistency: Slightly sticky dough is a good sign.If too wet, chill longer; if too dry, add a teaspoon of milk or cream.
- Egg yolk addition: The extra yolk adds moisture and chewiness, making your cookies irresistibly tender.
- Chilling dough: This step is a game-changer. It prevents cookies from spreading too much and deepens the flavor from sugar caramelization.
- Substitutions: For a healthier twist,swap part of the all-purpose flour with whole wheat flour,but keep at least half for balanced texture.
- Make-ahead: Cookie dough freezes beautifully. Portion dough balls onto a sheet,freeze solid,then transfer to a sealed bag for up to 3 months. bake from frozen adding a couple extra minutes.
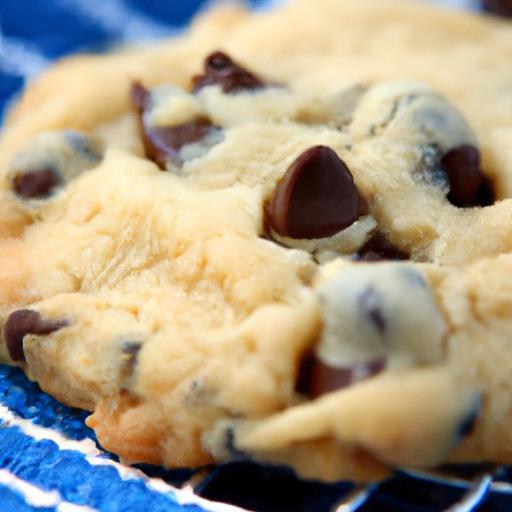
Serving Suggestions
Serve these classic chocolate chip cookies with a tall glass of cold milk or a scoop of vanilla bean ice cream for an extra indulgent treat. For gatherings, arrange cookies on a wooden board with fresh berries, sprigs of mint, and a drizzle of melted chocolate as elegant garnishes. They also make delightful gifts when wrapped in parchment and tied with twine.
| Nutritional Info (per cookie) | Calories | Protein | Carbs | Fat |
|---|---|---|---|---|
| Chocolate Chip Cookie | 180 | 2g | 22g | 9g |
Explore expert baking tips from AllRecipes to further refine your chocolate chip cookie baking adventures. For complementary baking inspiration,check out our How to Make chewy Brownies guide.

Q&A
Q&A: The Ultimate Guide to Baking Perfect Chocolate Chip Cookies
Q1: What’s the secret to getting chewy chocolate chip cookies every time?
A1: The key to chewy cookies lies in balancing moisture and fat.Using brown sugar instead of just white sugar adds extra moisture, while incorporating an extra egg yolk enriches the dough for that tender chewiness. Also, avoid overbaking-pull your cookies out when the edges are set but the centers still look slightly soft. They’ll finish cooking on the warm baking sheet!
Q2: Can I use different types of chocolate chips, or do classic semi-sweet chips work best?
A2: Absolutely! Semi-sweet chips are a classic choice, but don’t be afraid to experiment. Dark chocolate chips lend a rich depth, while milk chocolate offers a creamier sweetness. For a twist, try mixing in chunks of high-quality chocolate bars or even white chocolate chips to create bursts of melty goodness. Just keep in mind, different chocolates melt differently, so watch your baking time closely.
Q3: How does chilling the cookie dough affect the final cookie?
A3: Chilling the dough is a game changer! It allows the flour to fully hydrate and the fats to solidify, which slows down spreading. The result? Cookies with a thicker, more controlled shape and intensified flavors. For best results, chill your dough for at least 1 hour, or up to 24 hours for a deeper, more complex taste.
Q4: What’s the best way to avoid cookies that spread too much?
A4: Besides chilling the dough, the type of baking sheet and how you space your dough balls matter. Use a cool, heavy-duty baking sheet, and avoid greasing it-parchment paper or a silicone mat works best. Also, don’t crowd the cookies; leave plenty of room for expansion. Lastly, check your oven temperature with an oven thermometer-too hot can cause excessive spreading.
Q5: Can I substitute ingredients to make my cookies gluten-free?
A5: Yes! Gluten-free baking blends can frequently enough replace all-purpose flour cup for cup, but results vary depending on the brand and ingredients. For chewy,tender cookies,look for blends with xanthan gum or add it yourself if missing. Also, consider letting the dough rest a little longer-gluten-free flours sometimes benefit from extra hydration. Remember: texture might differ slightly from conventional cookies,but deliciousness is guaranteed!
Q6: What’s the difference between using melted butter and softened butter in cookie dough?
A6: Great question! Melted butter creates a denser,chewier cookie because it spreads the fat more evenly throughout the dough. Softened butter, creamed with sugars, traps air and results in a lighter, cakier texture. choose your butter form based on your ideal cookie style: gooey and dense or fluffy and tender.
Q7: How can I enhance the flavor of my chocolate chip cookies beyond basic ingredients?
A7: Tiny tweaks can make a huge difference! Try adding a pinch of flaky sea salt on top before baking to deepen the chocolate’s richness. A splash of pure vanilla extract or even browned butter adds complexity and warmth. Some bakers swear by a teaspoon of espresso powder to amplify the chocolate flavor without adding coffee taste. Experiment and find your signature touch!
Q8: What’s a handy tip for baking cookies evenly when my oven has hot spots?
A8: Rotate your baking sheet halfway through baking. This simple step evens out exposure to heat and promotes uniform browning. Also, placing your baking rack in the middle of the oven helps, keeping cookies away from the intense top or bottom heat sources.
Q9: Can I freeze cookie dough, and how should I bake from frozen?
A9: Yes, freezing dough is perfect for fresh cookies anytime! Scoop dough balls onto a baking sheet and freeze solid, then transfer to a freezer bag. when ready to bake, add a couple extra minutes to baking time and bake straight from frozen-no need to thaw.This helps maintain shape and texture beautifully.
Q10: What common mistakes should I avoid when baking chocolate chip cookies?
A10: Avoid overmixing once flour is added-it develops gluten and toughens cookies. Don’t overbake; cookies continue baking as they cool, so aim for just-set edges. Measuring flour incorrectly is also a frequent error-fluff, spoon, and level the flour rather than scooping directly. Lastly, skipping chilling dough can lead to flat, greasy cookies, so patience pays off!
With these tips in hand, you’re ready to master the art of chocolate chip cookie baking-happy baking and even happier eating!
Final Thoughts
And there you have it-the ultimate recipe and tips to transform your kitchen into a chocolate chip cookie haven. Baking the perfect cookie is both an art and a science, a delightful dance between precise measurements and joyful experimentation. Whether you prefer them soft and chewy or crisp and golden, this guide equips you with everything you need to master the craft.So, preheat that oven, gather your ingredients, and let the aroma of freshly baked cookies fill your home-because the perfect chocolate chip cookie isn’t just a treat, it’s a warm, comforting experience you can create again and again. Happy baking!