there’s something undeniably satisfying about biting into a chicken thigh with irresistibly crispy skin that crackles beneath your teeth, giving way to juicy, tender meat infused with rich, savory flavor. Mastering crispy cast iron chicken thighs isn’t just cooking-it’s an art form, blending technique, timing, and a few kitchen secrets to achieve that perfect harmony of texture and taste. In this flavorful guide, we’ll explore how to transform simple chicken thighs into a mouthwatering masterpiece using your trusty cast iron skillet, unlocking tips and tricks that will elevate your weeknight dinners and impress any guest at the table. Get ready to discover the magic behind every golden, crispy bite.
Crispy Cast Iron Chicken Thighs: A Flavorful Guide
crispy cast iron chicken thighs unlock an unrivaled combination of juicy tenderness beneath a golden, crackling skin-a technique celebrated in kitchens worldwide. This method brings out the best in chicken thighs, prized for their rich flavor and forgiving nature, making them the perfect canvas for bold seasonings and crispy textures. Whether you’re recreating a cherished family meal or elevating weeknight dinners, mastering these thighs promises impressive results every time.
Prep and Cook Time
- Readiness: 15 minutes
- Marinating Time: 30 minutes to 2 hours (optional but recommended)
- Cooking: 25 minutes
- Total: Approximately 1 hour
yield
Serves 4 generous portions
Difficulty Level
Medium – perfect for home cooks ready to upskill with cast iron techniques
Ingredients
- 4 bone-in, skin-on chicken thighs (preferably organic or free-range)
- 1 tablespoon olive oil
- 1 teaspoon smoked paprika
- 1 teaspoon garlic powder
- 1 teaspoon onion powder
- ½ teaspoon dried thyme
- ½ teaspoon salt (or to taste)
- ¼ teaspoon freshly ground black pepper
- Juice of half a lemon
- Optional marinade: 2 tablespoons plain yogurt mixed with spices above for tenderizing
Instructions
- Choose your chicken thighs carefully. Look for thighs with plump, unmarred skin and good fat coverage. Skin-on, bone-in cuts guarantee more flavor and moisture during cooking.
- Prepare your marinade or dry rub. Combine smoked paprika, garlic powder, onion powder, thyme, salt, and pepper. If using yogurt, blend spices into the yogurt. Coat chicken thighs evenly and allow them to marinate for at least 30 minutes, or overnight in the fridge for deeper flavor.
- Heat your cast iron skillet over medium-high heat. Add olive oil and allow it to shimmer but not smoke.
- Place the chicken thighs skin side down. Press gently to ensure full contact. Sauté for about 7-10 minutes without moving them, until the skin is deeply golden and crisp. Resist the urge to flip prematurely-this searing step locks in juices.
- Reduce heat to medium-low, flip thighs to bone side down. Cook for an additional 12-15 minutes, covered loosely with a lid or foil to trap heat and finish cooking gently without drying out.
- Check doneness. Internal temperature should reach 165°F (74°C). A meat thermometer is your best friend for accurate results.
- Remove from skillet and let rest. Allow thighs to rest 5 minutes before serving to redistribute juices.
- Finish with a squeeze of fresh lemon juice. This adds brightness and balances the richness beautifully.
Tips for Success
- For maximum juiciness, do not skip the skin-on, bone-in preference. Skin crisps while the bone radiates heat, retaining moisture inside the meat.
- Pat the chicken dry before seasoning. Moisture on skin can steam rather of crisp.
- Use a well-seasoned cast iron skillet for the best non-stick effect. Avoid moving the thighs too frequently to develop stunning crust.
- Marinating overnight in a spiced yogurt blend tenderizes and infuses deeper flavor. If short on time, at least 30 minutes of dry rub seasoning suffices.
- If the skin crisps too quickly, lower your heat slightly and cook slower to avoid burning.
- Make ahead tip: Fully cooked, cooled thighs can be refrigerated up to 48 hours; reheat in a hot skillet to revive crispiness.
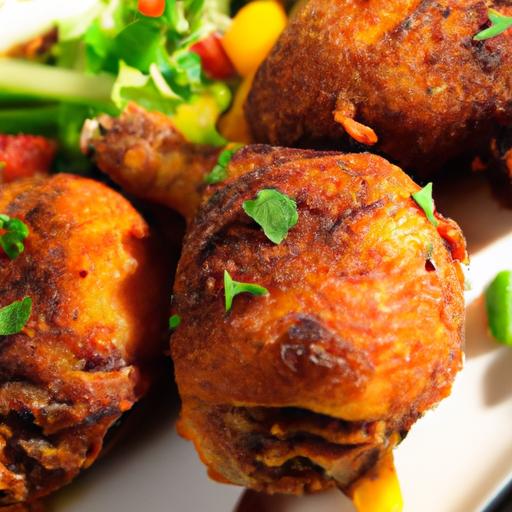
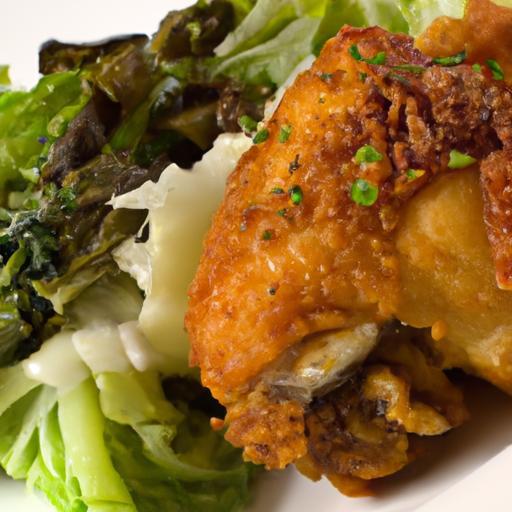
Serving Suggestions
Present your chicken thighs atop a bed of fluffy jasmine rice or creamy mashed potatoes for a comforting meal. vibrant sautéed greens like kale or Swiss chard add a lovely bitter contrast.Sprinkle fresh herbs such as parsley or cilantro for color and an herbal lift. A simple side of roasted root vegetables or a crisp, tangy cucumber salad complements the richness perfectly.
For garnish, consider lemon wedges on the side and a drizzle of high-quality extra virgin olive oil to enhance shine and aroma.

nutritional Facts Per Serving
| Calories | Protein | Carbs | Fat |
|---|---|---|---|
| 320 kcal | 28 g | 0 g | 22 g |
For more tips on cast iron cooking mastery, explore our extensive cast iron guide. To deepen your understanding of poultry safety and cooking temperatures,check the USDA guidelines here.
Q&A
Q&A: crispy Cast Iron Chicken Thighs – A Flavorful Guide
Q1: Why use chicken thighs rather of breasts for cast iron skillet cooking?
A: Chicken thighs are naturally more flavorful and juicier than breasts, thanks to their higher fat content. This fattiness not only keeps the meat tender during high-heat cooking but also helps achieve that coveted crispy skin,especially when cooked in a cast iron skillet which retains and distributes heat evenly.
Q2: What makes cast iron skillets ideal for cooking crispy chicken thighs?
A: Cast iron skillets excel at maintaining a consistent, high temperature, perfect for searing chicken skin until golden brown and crispy. Their ability to retain heat allows for an even crust formation, while also providing a forgiving surface that can go from stovetop to oven, making a seamless two-stage cooking process.Q3: How do I achieve perfectly crispy skin without burning it?
A: Start with entirely dry chicken skin-pat it with paper towels before seasoning. Preheat your cast iron skillet until it’s hot but not smoking. Place the thighs skin-side down without overcrowding the pan, allowing them to sear undisturbed for several minutes.Adjust the heat so that the skin browns slowly rather than burns quickly. Finish cooking in the oven if needed to ensure the thighs are cooked through.
Q4: What seasonings enhance the flavor of crispy cast iron chicken thighs?
A: Salt and freshly cracked black pepper are classic essentials that bring out the meat’s natural flavors. Adding garlic powder, smoked paprika, or a touch of cayenne can introduce depth and warmth. Fresh herbs like thyme or rosemary, added towards the end or as a garnish, provide bright herbal notes that complement the crispy skin.
Q5: Can I cook chicken thighs with the bone in and skin on in a cast iron skillet?
A: Absolutely! Bone-in, skin-on thighs are ideal as the bone helps conduct heat internally, which results in more evenly cooked, juicy meat. The skin provides that much-desired crispy layer, while the bone adds richness and flavor as it cooks.
Q6: What’s the best way to finish cooking chicken thighs after searing the skin?
A: After the skin is crispy and golden, transferring the skillet to a preheated oven (about 375°F or 190°C) completes the cooking process. This method ensures the inside cooks evenly without drying out while preserving the crispy exterior.
Q7: Are there any tips for cleaning my cast iron skillet after cooking chicken thighs?
A: Yes! Let the skillet cool slightly but clean it while it’s still warm. Use hot water and a stiff brush or non-metal scrubber to remove food bits-avoid using soap to preserve your seasoning. Dry the skillet instantly and apply a thin coat of oil to maintain the surface for future cooking adventures.
Q8: What side dishes pair well with crispy cast iron chicken thighs?
A: Roasted vegetables, such as carrots and Brussels sprouts, complement the richness of the chicken. Creamy mashed potatoes or a zesty lemony arugula salad add balance with their contrasting textures and flavors. For a wholesome touch,grains like quinoa or wild rice work beautifully alongside.
Q9: Can this method be adapted for cooking other types of poultry?
A: Definitely! The principles of preheating the skillet, drying the skin, and finishing in the oven apply well to duck breasts or turkey thighs, though cooking times and temperatures may vary slightly. the cast iron technique ensures a crispy exterior and juicy interior with any poultry cut.Q10: How do I store and reheat leftover crispy cast iron chicken thighs without losing their crispiness?
A: Store leftovers in an airtight container in the refrigerator. To reheat,use an oven or toaster oven at 350°F (175°C) to warm the chicken,which helps maintain the skin’s crisp texture. Avoid microwaving, as it tends to make the skin rubbery rather than crispy.
This Q&A provides a tasty roadmap to mastering crispy cast iron chicken thighs-a perfect blend of technique, seasoning, and kitchen care for flavorful, crispy perfection every time!
In Conclusion
As the comforting aroma of perfectly crisped chicken thighs lingers in your kitchen, you’ve uncovered the tasty magic that a well-seasoned cast iron skillet can create. From the first sizzle to the last golden, crackling bite, mastering this method transforms simple ingredients into a feast of texture and flavor. Whether you’re a seasoned home cook or a curious beginner, these crispy cast iron chicken thighs invite you to embrace patience, precision, and a little culinary adventure. So next time dinner calls for something extraordinary yet effortless, remember-your cast iron pan holds the secret to turning humble chicken into a crispy, juicy masterpiece that’s as satisfying to make as it is to eat.