There’s something undeniably comforting about sinking a spoon into a piping hot soup served inside a crusty, golden-hued bread bowl. Beyond its rustic charm, the sourdough bread bowl is a testament to centuries-old craftsmanship, marrying tangy depth with a sturdy vessel that’s as edible as it is flavorful.”Savor the Flavor: Mastering the Art of Sourdough Bread Bowls” invites you on a culinary journey where tradition meets technique, revealing how to transform simple ingredients into a loaf that’s both bowl and bite. Weather you’re a seasoned baker or a curious kitchen adventurer, this guide will unlock the secrets to achieving that perfect balance of chewy crumb and crisp crust – turning every meal into an irresistible experience worth savoring.
Savor the Flavor: Mastering the Art of Sourdough Bread Bowls begins with an essential understanding of choosing the perfect flour to create that iconic, crispy crust while maintaining a light, airy crumb inside. Flour selection can truly make or break your bread bowl-each variety offering unique gluten content, texture, and flavor attributes that elevate your baking experience to artisanal levels.
Prep and Cook Time
- Readiness: 30 minutes (plus 12-18 hours for fermentation)
- Active Cooking: 30 minutes
- Total Time: Approximately 13-18 hours
Yield
Makes 4 medium-sized sourdough bread bowls (about 8 inches diameter each)
Difficulty Level
Medium – perfect for bakers ready to level up their sourdough skills
Ingredients
- 350g bread flour (high protein content for strong gluten development)
- 150g all-purpose flour (to lend tenderness and subtle softness)
- 335g water (warm, around 75°F/24°C)
- 80g active sourdough starter (fed and bubbly)
- 10g fine sea salt
- Extra flour for dusting and shaping
- Optional: 1 tbsp olive oil (for brushing before baking to enhance crust shine)
Instructions
- Mix the dough: In a large bowl, whisk together bread flour and all-purpose flour. Add water and sourdough starter, stirring with your hand or a wooden spoon until the dough comes together.cover and let rest for 30 minutes (autolyse).
- Add salt and knead: Sprinkle salt over dough, then knead gently in the bowl for 5-7 minutes until it becomes smooth and elastic. Slight tackiness is okay. Cover and allow to rise at room temperature for 4-6 hours, folding the dough every 30 minutes during the first 2 hours to develop gluten.
- Divide and shape: Turn dough onto a lightly floured surface. Divide into 4 equal portions. Shape each into a round boules by folding edges beneath to create surface tension.
- Second rise: Place dough balls seam-side down on a floured couche or parchment-lined tray.Cover with a damp towel and proof for 2-3 hours, or refrigerate overnight for a slower, flavor-rich fermentation.
- Preheat oven and prepare baking vessel: Place a Dutch oven or heavy baking sheet inside your oven and preheat to 475°F (245°C) for at least 45 minutes for a steaming hot environment to develop the crust’s signature crunch.
- Shape and score: Using a sharp serrated knife or bread lame, gently score a circle about 1½ inches from the edge of each boule, cutting about ⅛ inch deep. This will become your bread bowl opening post-baking. Add radial cuts or leaf patterns just outside the circle for lovely, rustic detailing that helps vent steam and accentuate presentation.
- Bake the bread bowls: Carefully transfer each boule onto a preheated baking surface. Bake covered (with Dutch oven lid or tented aluminum foil) for 20 minutes, then remove cover and bake an additional 10 minutes until the crust is deep golden brown and crackly. Internal temperature should reach 205°F (96°C).
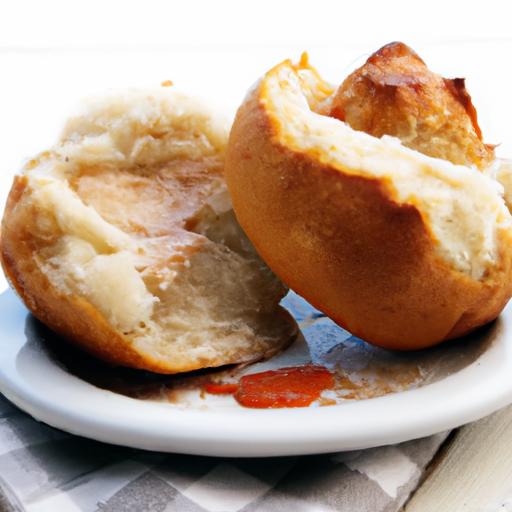
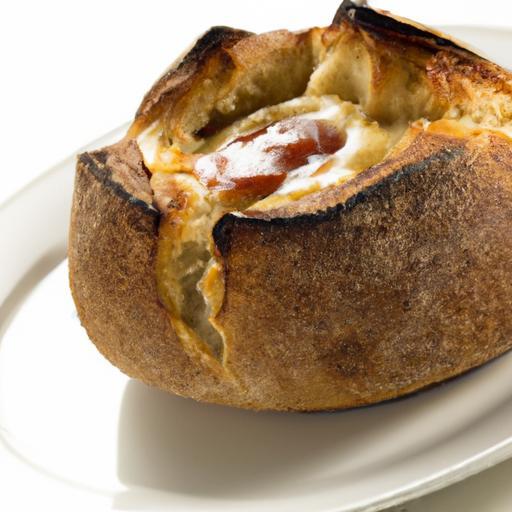
- Create the bowl: After cooling for 30 minutes, slice the scored circle lid off and gently hollow out the interior crumb to create space for your filling.
- Add fillings and serve: Fill with your chosen soup, stew, or creamy dips and reattach the lid as a charming serving accent.
Tips for Success
- Selecting the perfect flour balances gluten strength and moisture retention. Bread flour’s higher protein yields the crisp crust, while all-purpose flour adds softness for the airy interior that welcomes the filling gracefully.
- Keep hydration at a sweet spot (around 70%) for developability of a light crumb without a gummy centre.
- Folding regularly during bulk fermentation strengthens the gluten network,essential for holding the bowl’s structure when hollowed out.
- Don’t skimp on scoring. Artistic cuts don’t just look stunning but allow steam to escape evenly, preventing tears or bursting.
- Use a hot oven and steam during the first stage of baking by covering the bread-this encourages a blistered, crackling crust.
- For a glossy finish, brush the crust lightly with olive oil instantly after baking while warm.
- Plan ahead-the slow, natural fermentation improves flavor complexity dramatically, so overnight refrigeration of shaped dough is recommended.
Serving Suggestions
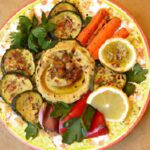
The artful presentation of your sourdough bread bowls elevates any dining occasion. Try filling them with creamy roasted tomato bisque, spiced lentil stew, or a velvety mushroom and thyme chowder. Garnish with fresh chopped herbs like parsley, chives, or mint and a drizzle of extra virgin olive oil for a fresh, vibrant touch.
For a colorful contrast,add a dollop of herbed sour cream or a sprinkle of toasted nuts or seeds atop your soup-filled bowls. Serve with rustic wooden boards or cast iron trivets to enhance the artisanal feel and encourage slow savoring.
| nutrient | Per Bread Bowl |
|---|---|
| Calories | 380 kcal |
| Protein | 12 g |
| Carbohydrates | 70 g |
| Fat | 2 g |
For further inspiration on crumb structure and fermentation lab techniques, visit King Arthur Baking, a trusted authority for bakers worldwide.
Enhance your sourdough pastry skills and explore variations by checking out our Artisan Sourdough bread Basics guide for mastering hydration and fermentation nuances.

Q&A
Q&A: Savor the Flavor: Mastering the Art of Sourdough Bread Bowls
Q1: What makes sourdough bread the perfect choice for bread bowls?
A: Sourdough’s tangy flavor and chewy, crusty exterior create a sturdy vessel that holds soups and dips without falling apart. Its natural fermentation also gives the bread a unique depth of taste, enhancing every bite of your favorite filling.
Q2: How do you ensure the sourdough bread bowl is strong enough to hold liquid?
A: The key is baking the bread longer than usual to develop a thick, golden crust. Also, carving out the interior carefully, leaving about a one-inch thick wall, ensures durability. Some bakers even toast the inside lightly to create a moisture barrier.
Q3: What’s the best way to shape sourdough dough for a bread bowl?
A: Shape your dough into a tight,round boule (ball) and practice gentle tension while shaping. A well-shaped boule rises evenly and forms a firm crust ideal for hollowing out.
Q4: Can you share tips for hollowing out the bread without damaging the shell?
A: Start by cutting a circular lid on top with a serrated knife. Then, gently scoop out the interior crumb with your fingers or a spoon. Take your time and leave enough bread intact to maintain the bowl’s structure.
Q5: What types of fillings pair wonderfully with sourdough bread bowls?
A: Creamy vegetable soups like roasted tomato or butternut squash, hearty bean chili, or savory mushroom ragout are all fantastic choices. The mild tang of sourdough complements rich, flavorful fillings beautifully.
Q6: How can you store leftover sourdough bread bowls to keep them fresh?
A: Wrap any leftover bread bowls tightly in plastic wrap or place them in an airtight container. Store at room temperature for up to two days, or freeze for longer storage and thaw before reheating gently in the oven.
Q7: Is it possible to make gluten-free sourdough bread bowls?
A: Yes, though gluten-free sourdough requires specific flours and techniques to achieve a sturdy crust and texture. Experimenting with blends like rice flour, tapioca, and sorghum can yield excellent results, but patience is key to mastering the process.
Q8: How does fermentation time affect the flavor and texture of sourdough bread bowls?
A: Longer fermentation allows wild yeast and bacteria to develop richer acids and flavors, resulting in a more complex tang and better digestibility. It also improves the crust’s crunch and interior crumb texture-crucial for a functional bread bowl.
Q9: Can sourdough bread bowls be made ahead of time?
A: absolutely! Bake them a day in advance and store them wrapped at room temperature to maintain freshness. When ready to serve, warm them briefly in the oven to refresh the crust and enhance the aroma.
Q10: Any creative twists to make sourdough bread bowls even more special?
A: Try adding herbs like rosemary or thyme to the dough for an aromatic boost, or sprinkle coarse sea salt and cracked black pepper on top before baking.You can also brush the crust with garlic-infused olive oil post-bake for a flavorful finish.
Mastering sourdough bread bowls is a delightful journey into texture, flavor, and creativity-one bite at a time!
Concluding Remarks
As the aroma of your freshly baked sourdough bread bowl fills the kitchen, you’ll discover that this humble creation is more than just a vessel-it’s a centerpiece that elevates every meal it holds. Mastering the art of crafting these golden, crusty bowls invites you to embrace both patience and creativity, transforming simple ingredients into edible works of art. Whether cradling a creamy chowder, zesty chili, or vibrant salad, your homemade bread bowl promises not just a feast for the taste buds, but a tactile and sensory experience that honors tradition while inspiring innovation. So roll up your sleeves, gather your flour and water, and start shaping bowls that will delight your senses and impress your guests-as with sourdough, every bite savored is a story well told.